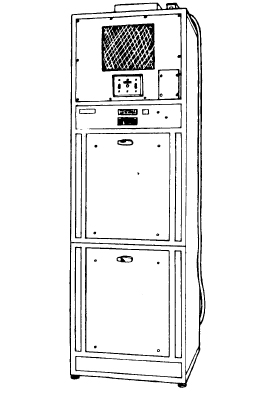
MANUAL PROCESSING
The manual processor uses the standard time-temperature method and small containers of the different processing solutions. The dental specialist should be familiar with the manual processor in case the automatic processor is not available. The manual processor will allow the dental specialist to continue providing support to the dental officer without interrupting patient treatment.
NOTE: Manual processing is the primary method whereby film will be processed when field equipment is used.
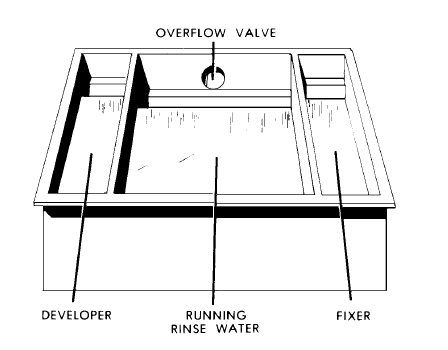
a. Processing Tank. The processing tank most commonly used in dental clinics has three compartments (see figure 3-4). The compartment to the left contains the developing solution, water is in the center compartment, and the fixing solution is on the right. In addition to the three compartments, a source of hot and cold water, a drain, an overflow valve, and a cover are needed. The water is adjusted to the proper temperature and is allowed to circulate in the middle compartment and pass from the tank by the overflow valve. This action provides temperature controls to the developing and fixing solution.
b. Processing Procedures. In order to produce a radiographic image, the processing procedure for the film is sequenced as follows: developing, rinsing, fixing, washing, and drying. The quality and diagnostic value of radiographs depend upon proper processing procedures.
c. Developing. All equipment should have a definite place in the darkroom to facilitate handling when the user is working by the
safelight only.
Steps used when developing film are as follows:
(1) Wash gloved hands, so that hands are clean and dry. This is to prevent the appearance of finger marks on the developed film.
(2) Remove the lightproof wrapper from the film.
NOTE: operating procedures.Dispose of contaminated wrappers in accordance with (IAW) local standing
(3) Place the film on the film holder. The film should be held lightly by its edges to avoid the appearance of
smudges or fingerprints on the developed film. They may
appear even when the hands are clean.
(4) Set the interval timer (clock) for the prescribed developing time. Timer should start when the film is placed in the developing
solution (developer).
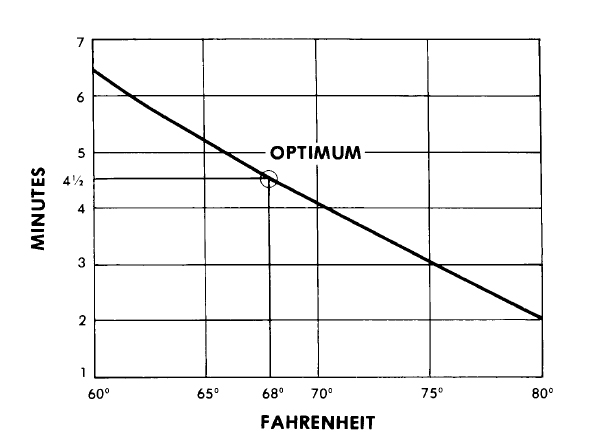
NOTE: The recommended temperature for the developing solution is 68º F (20º C).
At this temperature, most films should be left in the developer exactly 4 1/2
minutes. Without adequate equipment, 68º F (20º C) cannot always
be obtained. In that case, the time factor should be adjusted according to the chart in figure
3-5. Temperatures above 70º F (21ºC) and below 60ºF
(15ºC) should be avoided if possible.
(5) Immerse the film in the developing solution (figure 3-6), moving the film holder up and down several times to break up air bubbles that
may have
formed on the surface of the film.

NOTE: If bubbles are allowed to remain, they prevent the developer from acting on
the area of film contained in each bubble. Also, care should be taken to ensure that the film
does not touch another film or touch the sides of the tank. Such contact affects the emulsion and prevents the developer
from acting upon it properly.
(6) Remove the film at the expiration of the developing time. Hold the film rack in a tilted position for a few
seconds to allow excess solution to drain into the developing section
of the tank.
(7) Rinse the film in clear water.
d. Rinsing. The film should remain in the rinse water at least 20 seconds to remove the developing solution. Be sure to tilt the film rack to allow excess water to drain back in.
(You do not want to dilute the fixing solution.) After removing the film from the rinse water (figure 3-7) and draining, place it in the fixing solution (fixer).
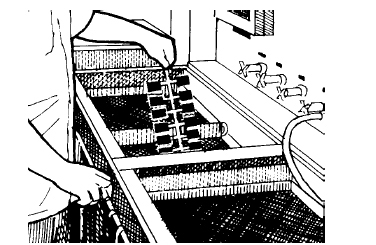
e. Fixing. During the first stage of fixation, unexposed silver crystals are removed from the film, thereby clearing the film and making the image translucent. The hanger should be moved up and down several times (figure 3-8) to make sure the fixer contacts all surfaces. An average safe time for the film to remain in a fresh fixing solution is 10 minutes. This provides time for the emulsion to harden properly after the film has cleared. The film may be examined briefly after 1 minute in the fixer, but it must be returned to the solution to complete the hardening process. For wet readings, a minimum of 2 minutes of fixation is required. After readings, the film must be returned to the fixing solution to complete the process.
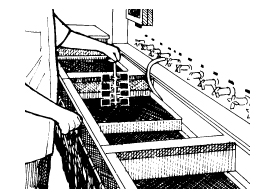
f. Washing. Upon the completion of fixation, the film should be immersed in fresh, cool, circulating water for at least 20 minutes to ensure complete removal of the fixing solution (figure 3-9). If not washed properly, the radiograph will turn yellow and fade with time if any of the fixing chemical remains on its surface.
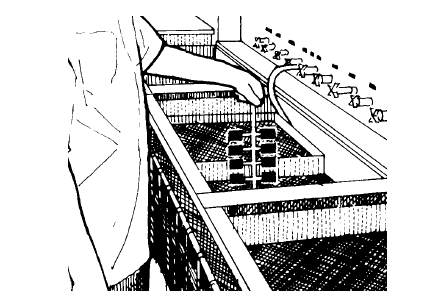
g. Drying. Wet films must be handled carefully so that the emulsion is not touched or marred. After washing, the hanger should be hung carefully upon the drying rack. A pan under the rack serves to catch water dripping from films. Drying is done by leaving the film suspended in the air until it is completely dry. Drying may be speeded up by directing a current of air from a small electric fan over the film's surface or by using an x-ray film drier (see figure 3-10).
